


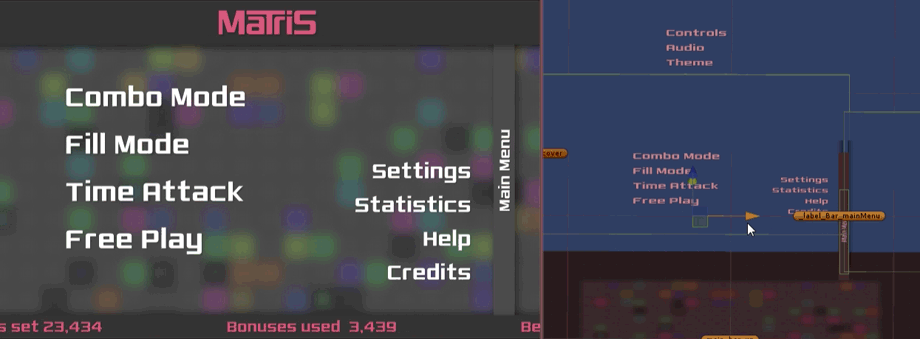
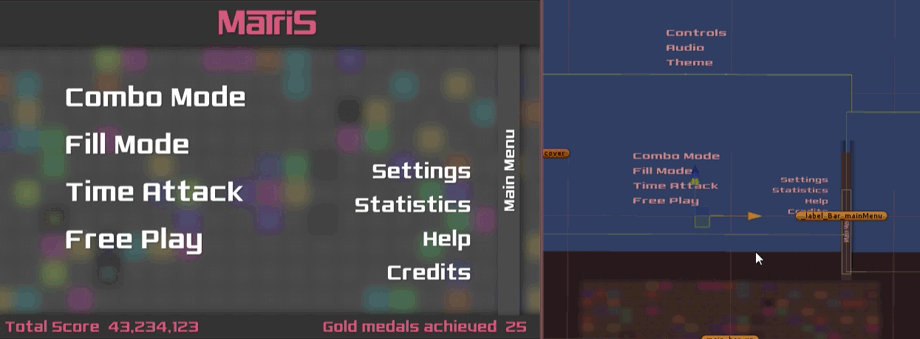
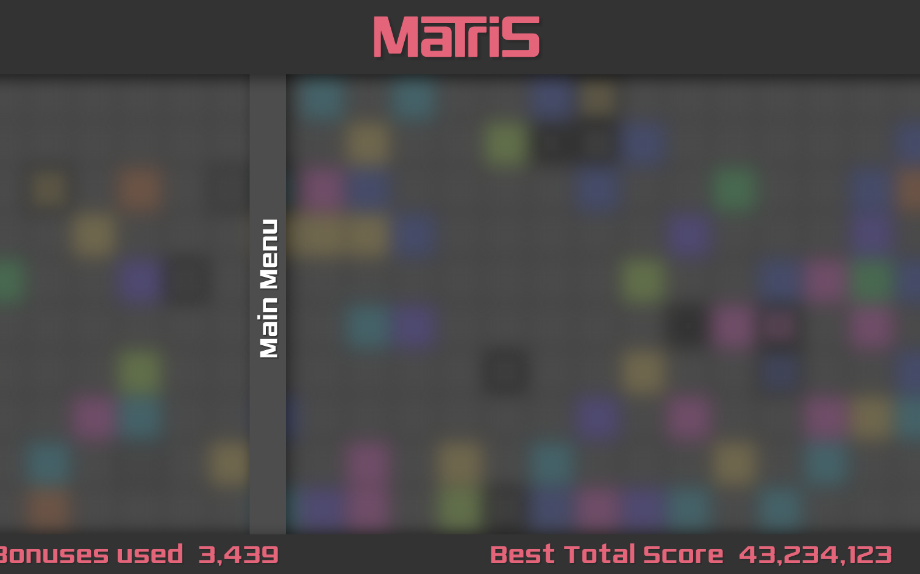
Sliding menu system using Texture Mask shader
Some of the reddit folks liked the menu system that I made for my newest game
If you'd like to support me you can visit MATRIS Greenlight page and vote "Yes" :) , so I made a tutorial on how to do it.

There are two variants of this sliding Menu system - one with moving screens and one with fixed screens.
Moving screens
This one is very easy and I personally liked it better in my game so I went with that one.
// the sample animation is slowed down to better see the effect. In game the sliding is 3x faster //
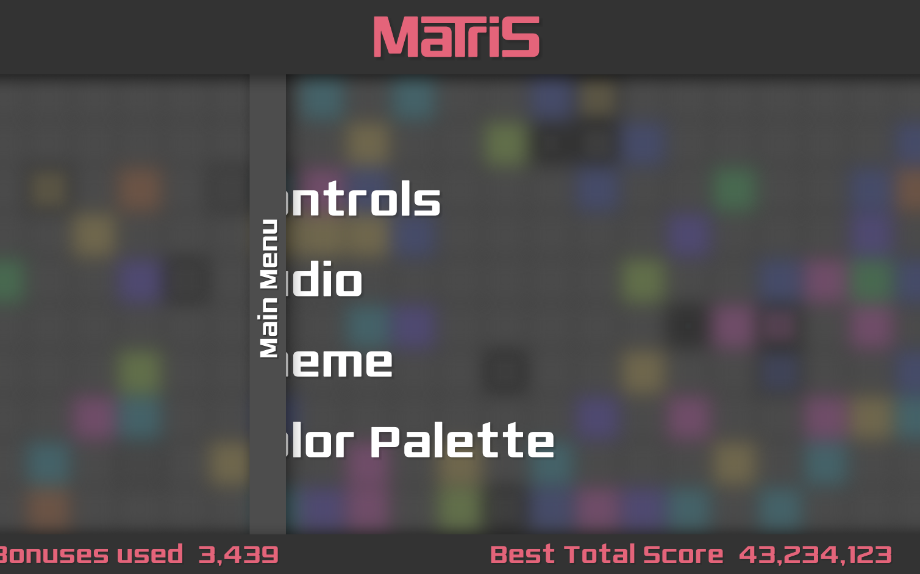
Fixed screens
This one is a bit tricky as it makes use of Render Queue. The screens are fixed and only the Vertical Bar moves, covering one screen and uncovering the other at the same time.
Moving screens method
Moving screens method is simple. First you'll need a Texture Mask shader created by Ablaze, which you can get here:
http://wiki.unity3d.com/index.php/TextureMask
or just copy it from here:
Shader "MaskedTexture"
{
   Properties
   {
      _MainTex ("Base (RGB)", 2D) = "white" {}
      _Mask ("Culling Mask", 2D) = "white" {}
      _Cutoff ("Alpha cutoff", Range (0,1)) = 0.1
   }
   SubShader
   {
      Tags {"Queue"="Transparent"}
      Lighting Off
      ZWrite Off
      Blend SrcAlpha OneMinusSrcAlpha
      AlphaTest GEqual [_Cutoff]
      Pass
      {
         SetTexture [_Mask] {combine texture}
         SetTexture [_MainTex] {combine texture, previous}
      }
   }
}
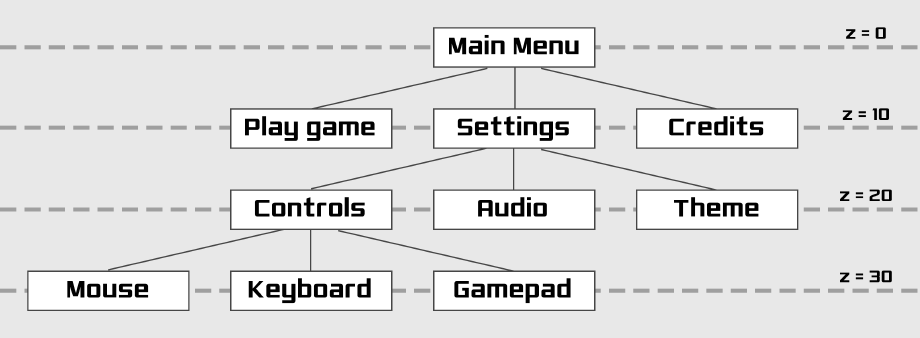
In this method every menu screen layer has it's own Z position, so if Main Menu would be on position.z = 0, then eg. Settings and Credits screens, which you can acces from the Main Menu would be on position.z = 10.
Additionaly every menu screen would have on it's local position.z += 5 a mask that covers the menu screens behind it.
Menu screens should have a tree hierarchy. If some screen is on position.z = P, then all screen you acces from that screen are on position P + 10;
- all screens besides Main Menu should be disabled by default
- when corresponding sub-menu button is pressed, you activate given sub-menu screen
- lerp the screen in front of it aside, thus uncovering it
- when going back from the sub-menu to the previous menu, deactivate sub-menu when the previous menu screen covers it
The background should be closer to the camera than the closest menu (Main Menu) but have a very high Sorting Order. So, because of the high Sorting Order it's rendered last - behind all other objects, but is not influenced by all the masks because it's in front of them.
TIP - Good idea is to make a spreadsheet with the screens tree hierarchy and corresponding Z positions on each menu layers.
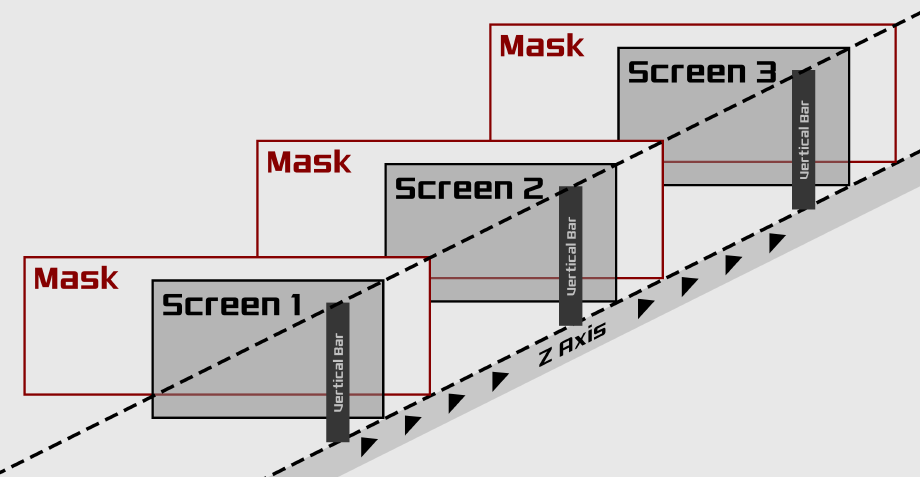
Fixed screens method
Fixed screens method is a bit trickier. In this method all menu screens have fixed position and only the Vertical Bars slides left and right, covering and uncovering screens.
To make this method work you'll have to use Render Queue.
Here is a script to change render Queue for a single object:
public class _renderQueue : MonoBehaviour
{
   public int order;

   void Awake ()
   {
      Material[] materials = GetComponent ().materials;

      for (int i = 0; i <  materials.Length; ++i) {
         materials [i].renderQueue = order;
      }
   }
}
This scripts allows to change render queue for one object it is applied to.
Here is another script that allow to change a render queue for an array of objects.
public class _renderQueueArray : MonoBehaviour
{
   public int order;
   public GameObject[] renderQueueArray;

   void Awake ()
   {
      foreach (GameObject child in renderQueueArray) {
         Material[] materials = child.GetComponent ().materials;

         for (int i = 0; i < materials.Length; ++i) {
            materials [i].renderQueue = order;
         }
      }
   }
}
With the array script you can add it to any menu screen object and assign all renderable object from that screen to that GameObject array and change the renderQueue for all these Objects at once, with one script.
If you have your scripts ready, you can start preparing the screens.
In this method all screens are fixed on their position. Their positioning is the same as in the other method, so Main Menu at position.z = 0, settings at position.z = 10, and so on.
Additionaly every menu screen have to have it's vertical Bar object.
If the menu screen is at the position.z = 0, its Vertical Bar object will be at the same position and it will include:
- the Vertical Bar, so a stripe that will cover the transition between two screens at Local position -=4
- left mask, starting from the middle of the Bar and going far left. Local Position Z += 3
- right mask, starting from the middle of the Bar and going far right. Local Position Z -= 3

Now we have a menu screen and its Vertical Bar object, with two masks, from which one is on the left side of the bar and BEHIND that menu screen, and one is on the right side of the bar and is IN FRONT of that menu screen. The left mask doesn't influence its menu screen but it masks out the screens behind it. The right mask is in front of that screen so it masks it... and also the screens behind it? yep. If it masks the closer screen then it surely is masking further screens.
This is where we need Render Queue script.
To explain how it works I will use as an example the Main Menu screen and the Settings menu screen (you go into settings menu screen by pressing a button on the Main Menu screen).
First of all we need to establish some minimum render queue. Lets make it 3000. This will be the base queue to all other queues.
The Main Menu screen would have a render queue = 3500, so all renderable elements in Main Menu screens needs to have their Render Queue set to 3500.
Queues in Main Menu Vertical Bar object:
- Left mask always has to have the minimum queue which we established at 3000
- Right mask must have a queue a little bit lower than the corresponding menu screen. Main Menu queue is 3500 so lets make the Right Mask queue 3480
- Vertical Bar masking Stripe should always render before anything, so it must have a queue lower than Minimum. Lets make it 2990
The Settings menu screen is behind the Main Menu scren so it has to render before it. Lets set the Render Queue for all Settings screen elements to 3400.
Queues in Settings menu Vertical Bar object:
- Left mask always has to have the minimum queue which we established at 3000
- Right mask must have a queue a little bit lower than the corresponding menu screen. Setting menu queue is 3400 so lets make the Right Mask queue 3380
- Vertical Bar masking Stripe should always render before anything, so it must have a queue lower than Minimum. Lets make it 2990
How it works?
To understand how it works, we need to understand how Render Queue works. Render Queue tells the Renderer which elements should be rendered first.
I will explain it on this Main Menu/Settings screen example. Lets ignore the Settings screen Vertical Bar (with its masks) for now as it doesnt influence anything in this example.
- The very first Render Queue in our elements is 2990 on a Vertical Bar masking Stripe so it renders first
- The next Render Queue is 3000 which is a left mask from the Main Menu screen. The Mask is not really rendered, it just means, that when it's "rendered" everything that is rendered AFTER and is placed BEHIND the mask is gone. It wont render. So it the Vertical Bar object is halfway through the screen the mask will cover half of the Settings screen.
- The next Render Queue is 3400 on Settings screen elements. But because they are rendered AFTER the mask and they are partially behind it, the part that is covered by the mask wont be rendered. So we get only port of the Settings screen
- What's left is a right mask from the Main Menu Vertical Bar object and the Main Menu screen. If the Main Menu screen elements have the Render Queue lower than the Right mask, the whole Main Menu would render, overlapping already partially rendered Settings screen. We dont want that. Thats why the Right mask renders first. So, the Right mask is "rendered" before the Main Menu screen and it's in front of it so it would mask it. It wont mask the Settings screem, even though it is also behind it, because Settings Screen is already rendered.
- And the last step is rendering the Main Menu screen. Because the Right mask was already rendered, only the part of the Main Menu screen that is not covered by the mask would be rendered.
Using This method it's possible to render many nested sub-menus with no problem. The rules to remember are:
- The Left mask must always have the established minimum Render Queue
- Vertical Bar masking Stripe (which you dont actually have to use it. It's just a decoration to cover the transition) mus always have the Render Queue lower than the Left Mask/established minumum
- Menus elements must have a Render Queue higher than the established minimum, and the closer the menu is to the Camera the higher the Render Queue
- Right mask of each Menu screen Vertical Bar object must always have a Render Queue lower than the corresponding Menu screen
TIP - Good idea is to make a spreadsheet with the screens tree hierarchy and corresponding Z positions on each menu layers and their Rendering Queues order
TIP - Main Menu must have the highest Render Queue, so its good to make it's Render Queue at 4000 and then each sub-menu layer further would have a Render Queue 100 lower
And that's it. I hope I explained it clear enough. If you have any questions don't hesitate to ask. I will try to help if I can.
I appreciate all feedback.
You can leave a comment on Reddit:
[ Reddit ]
or on Fecebook:
[ Facebook ]
If you liked the tutorial you can Like me on [ Facebook ]
or follow me on [ Twitter ].
If you would like to support me you could visit my newest game Matris GreenLight page, and if you think I deserve a chance on Steam, vote "Yes" for Matris.
Thanks for reading. I hope I helped someone making their Menu system or at least understanding how Render Queue works.
Cheers
Leaghorn

